If you’re a YouTuber who also runs a blog, you know how hard it is to keep both going. The good news: every video you’ve already made is a blog post waiting to be written.
Repurposing videos as blog posts gets your content in front of readers who skip YouTube, helps your site rank in search, and squeezes more value from work you’ve already done. In this post I’ll show you exactly how to do it.
Why Repurpose YouTube Videos for Blog Posts
Reach New Readers and Viewers
Not everyone watches videos. Some people prefer to read, search, and skim. Turning your videos into blog posts puts your content in front of an audience that would never find you on YouTube alone.
This matters especially for content marketing. A blog gives you more control over the experience than social media does. You can collect email addresses, run promotions, and build a direct relationship with readers, all things that are harder to do through YouTube alone.
Boost Your Blog’s Search Engine Traffic
Blog posts created from your videos can rank in search and bring new readers to your site. It’s worth doing keyword research before you publish so the post targets a real search term rather than just mirroring your video title.
Picking the Perfect Videos for Your Blog
Not every video converts well into a blog post. A vlog works better in video format. Choose content that stands on its own in text.
Evergreen Content
Pick videos that keep getting views long after they’re published. Those are the posts that will also rank in Google over time.
Tutorial and How-To Videos
Tutorial videos are ideal for conversion. They have clear step-by-step structure that translates directly into a blog post, and you can pull screenshots from the video to use as illustrations without any extra work.
How to Convert YouTube Videos to Blog Posts
Here’s the step-by-step process for turning a YouTube video into a blog post using AI.
Step 1: Get The Transcript
First you’ll need to grab a YouTube video transcript. This is where all the rich content of a video lives and what we’ll use to build the blog post.
YouTube offers transcripts for most videos built in. You can also use RightBlogger’s transcript downloader with a free account to copy the full transcript in one click.
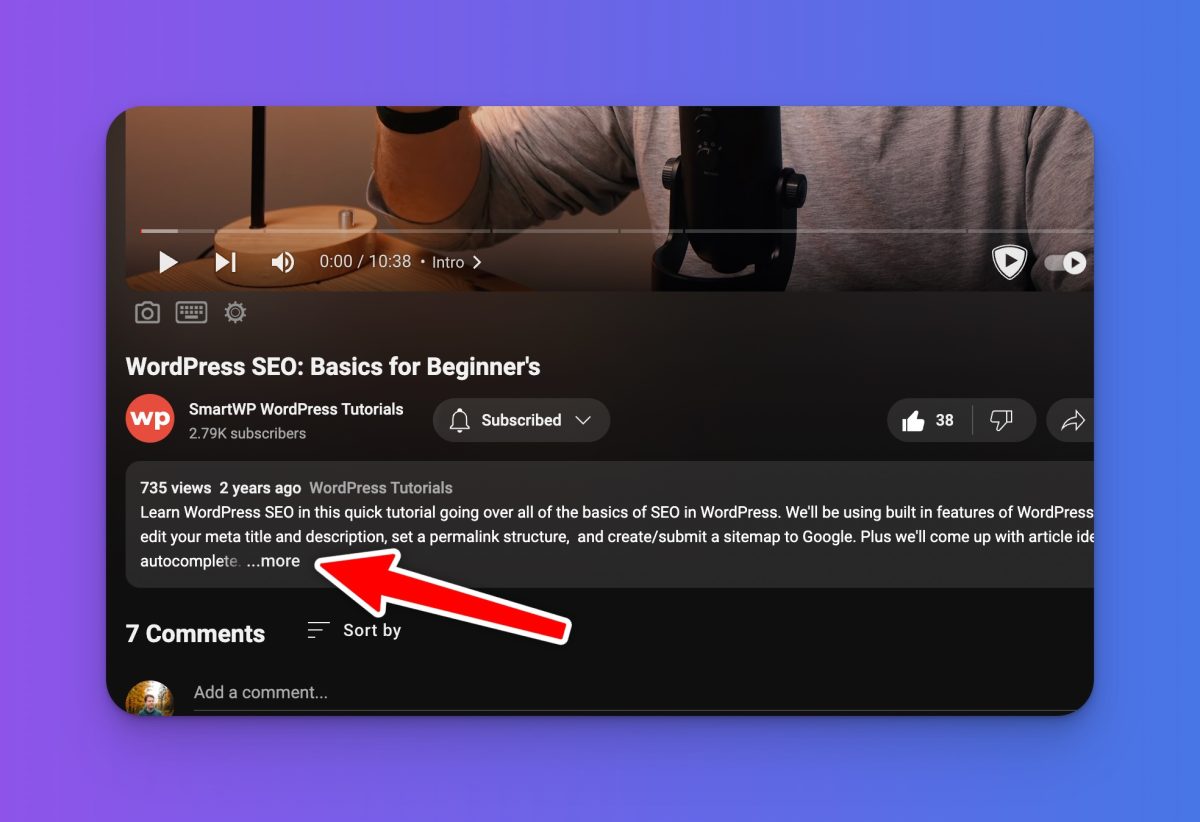
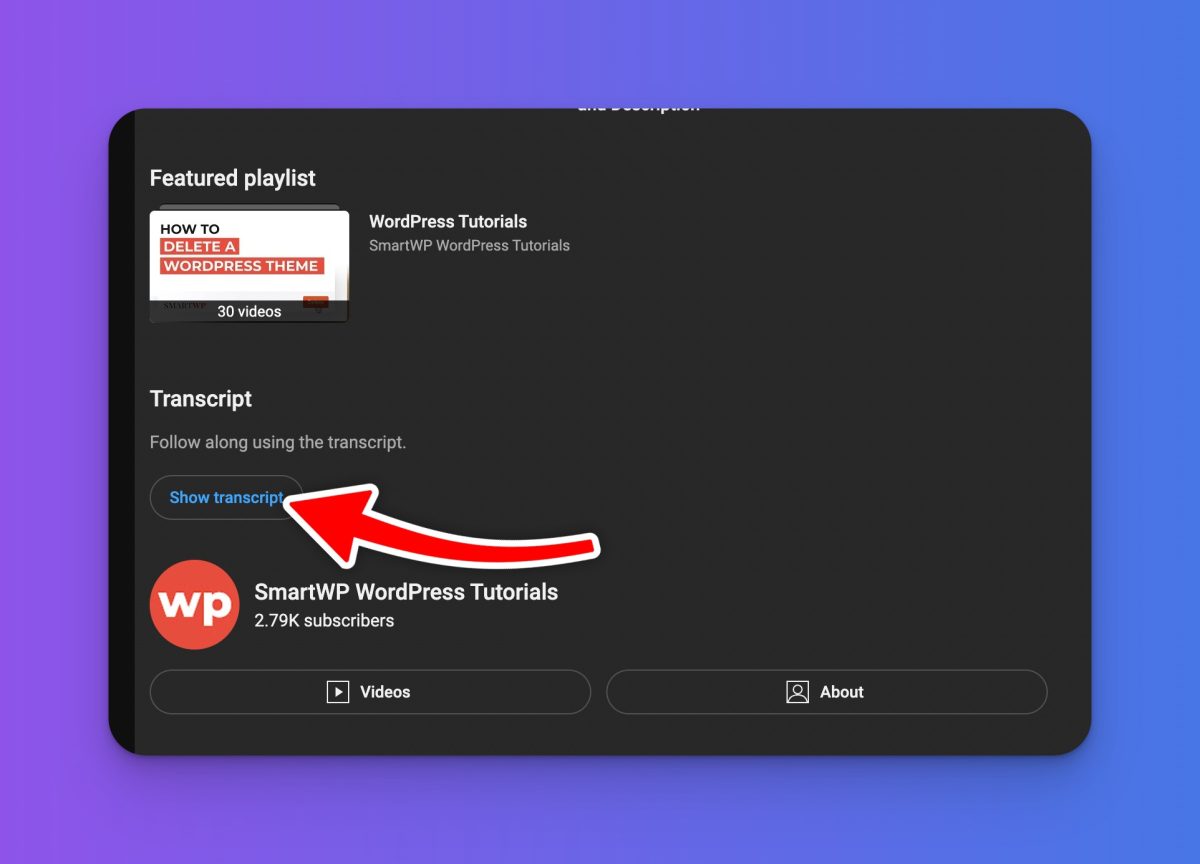
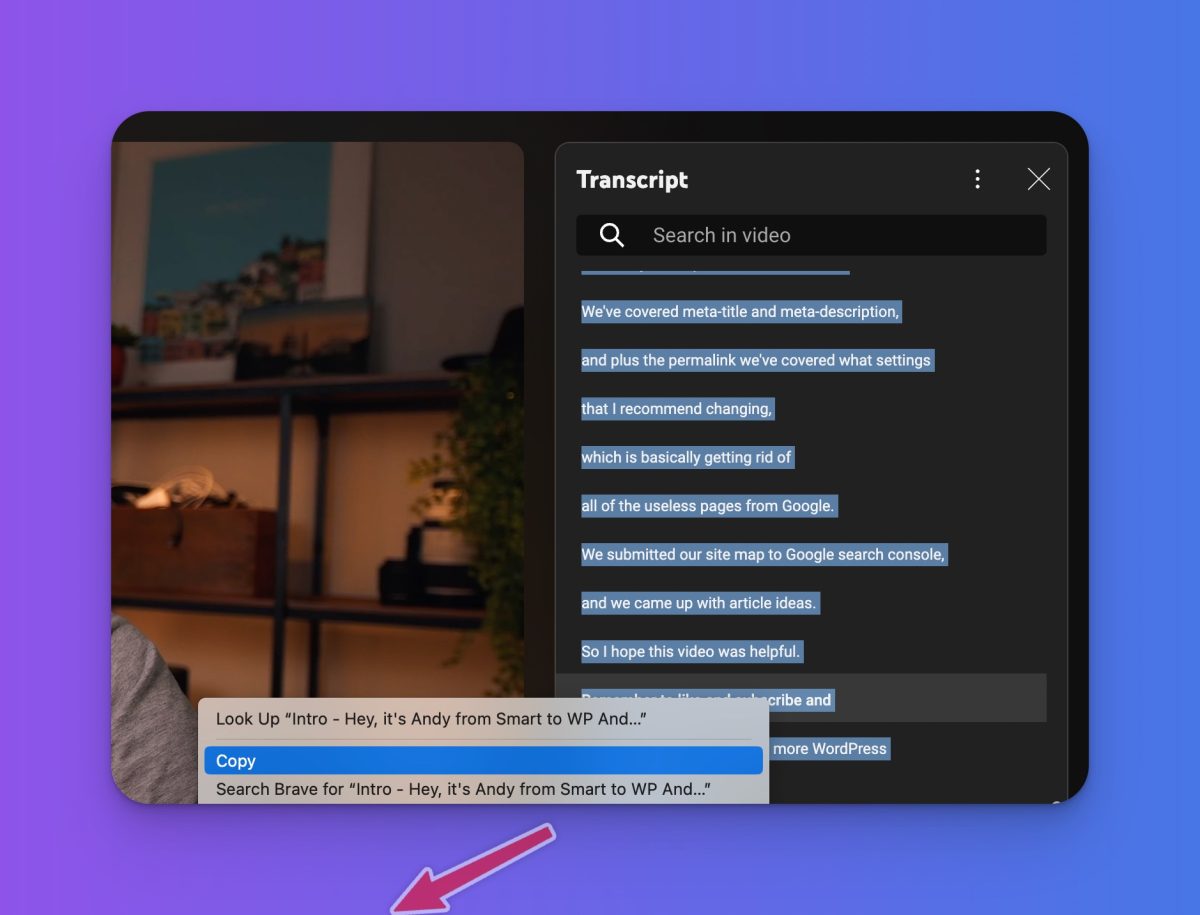
Click the more button on any video to find the “show transcript” button. This brings up a sidebar with the full transcript.
After the transcript appears you’ll notice timestamps next to each line. You don’t want those, so click the “…” button and toggle the timestamps off.
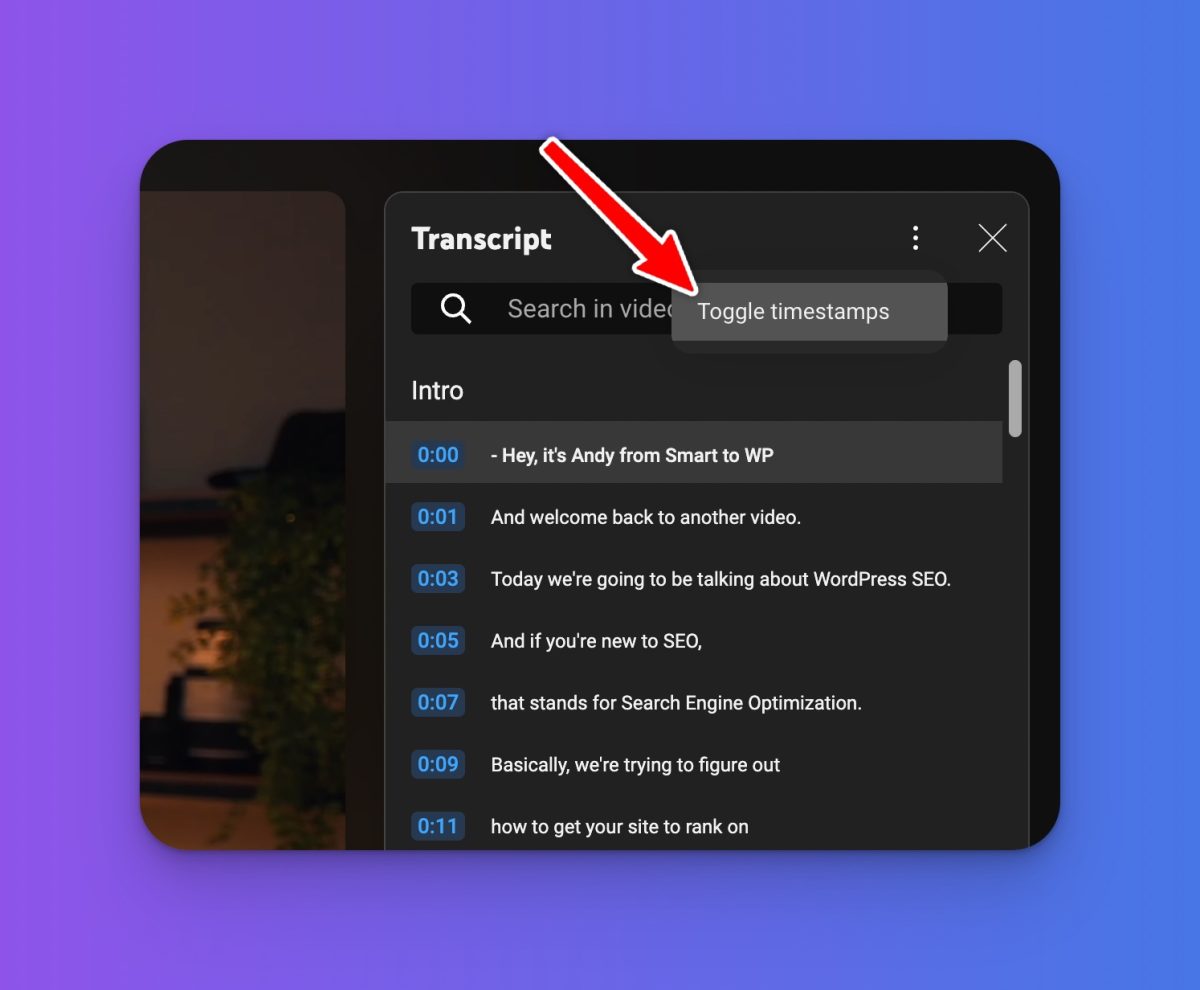
Once the timestamps are gone, highlight all the text and copy it. If you only want part of the video, copy just the relevant sections. This works well for long videos like podcasts where you want to blog about a single segment.
If a video doesn’t have a transcript, use a service like Rev to create one. Rev is one of my favorite paid options since it delivers captions and subtitles back to YouTube automatically.
On a Mac, MacWhisper transcribes videos locally and outputs a .SRT file you can upload to YouTube or LinkedIn. I’ve found the transcriptions better than YouTube’s auto-captions.
RightBlogger also has an AI video and audio transcription tool if you’d rather handle everything in one place.
Once you have the transcript copied, head over to ChatGPT to generate a blog post outline.
Step 2: Outline with AI Help
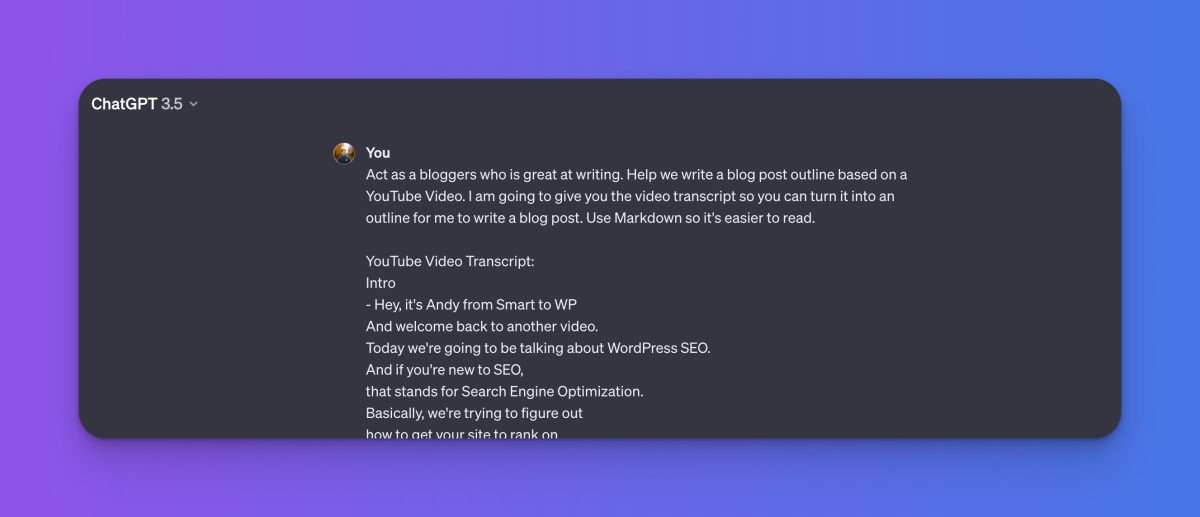
Use ChatGPT to turn your transcript into a blog post outline. Here’s a prompt template to get started. I’d also recommend adding “The primary keyword of my article is [keyword]” at the top if you’re targeting a specific search term, which helps shape the structure around what people are actually searching for.
Act as a blogger who is great at writing. Help me write a blog post outline based on a YouTube video. I am going to give you the video transcript so you can turn it into an outline for me to write a blog post. Use Markdown so it's easier to read.

YouTube Video Transcript:
[PASTE YOUTUBE VIDEO TRANSCRIPT HERE]
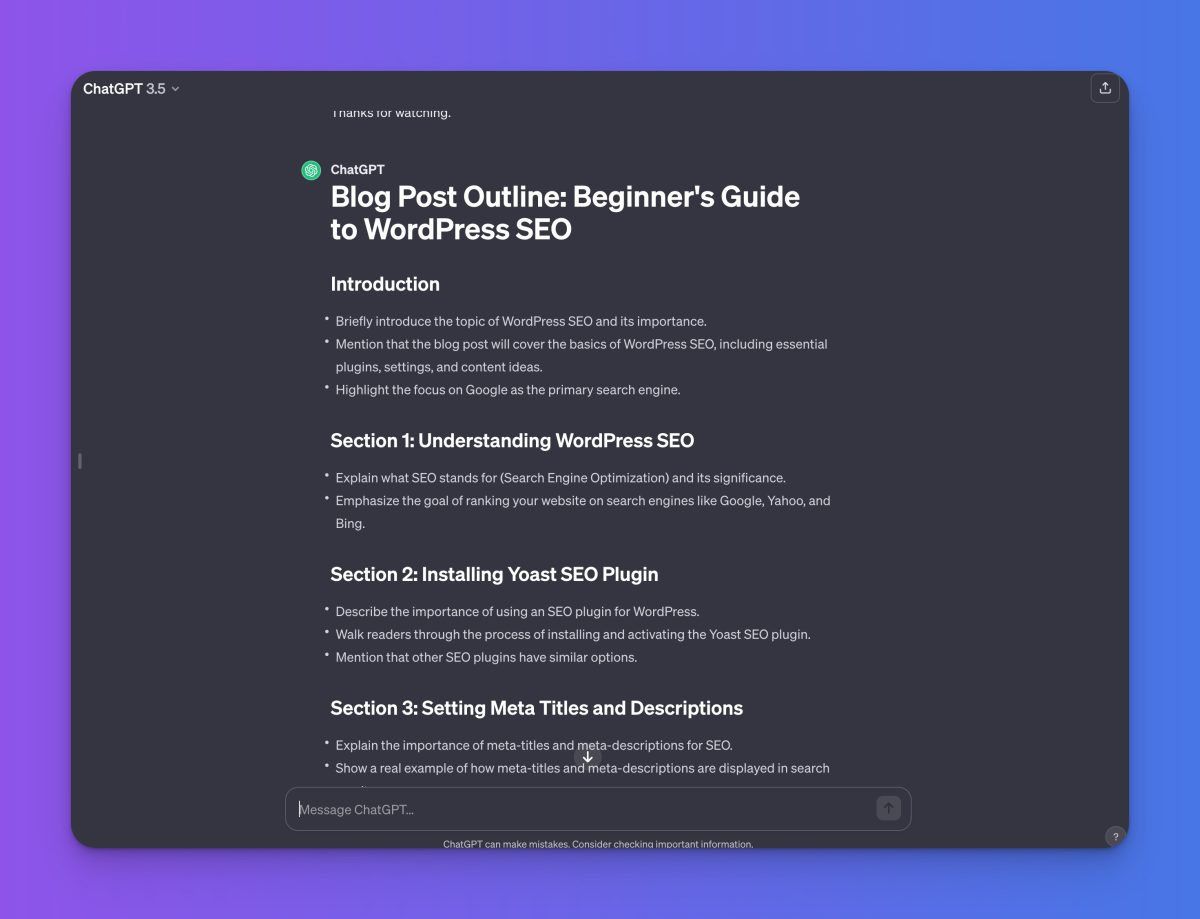
ChatGPT will convert the transcript into a structured outline. You can then ask it to write each section, but don’t just copy and paste the raw output. You’ll want to edit it and add your own voice before publishing.
Step 3: Edit Your Post
Copy the content from ChatGPT into your blog CMS and start editing. The AI-generated outline keeps you on track while leaving room for your exact writing style.
Don’t have a blog yet? Learn how to start one. A blog gives you full control over your audience, lets you grow an email list, and ranks in search in ways YouTube alone can’t.
This step is where you add what AI can’t: specific details, your actual opinions, screenshots pulled from the video, and internal links to other posts on your site. Embedding the original video in the post is also a good move, serving both readers and viewers from one page.
Google has been clear that AI content designed to game the algorithm gets removed from search. Read over everything, refine it, and make sure the post sounds like you wrote it.
Step 4: SEO Optimize Your Post
Before publishing, run through these SEO basics:
- Title and meta description: Include your primary keyword in both. A WordPress SEO plugin like Yoast or RankMath makes this straightforward to manage.
- URL slug: Keep it short and keyword-focused. Trim any auto-generated slugs that are a long string of words.
- Alt text on images: Every screenshot you pull from the video should have descriptive alt text, not just the filename or “image”.
- Internal links: Link to related posts on your site where it fits naturally. This helps both readers and search engines understand your content.
I wrote a full breakdown of WordPress SEO tips if you want to go deeper on any of these.
Skip the Manual Steps with RightBlogger
If you’d rather skip the manual process, I built a YouTube to blog post converter on RightBlogger that handles everything from a single URL. Paste in your video link and it generates a full post. You pick the article length, writing style, language, and primary keyword, and can add custom instructions on top. RightBlogger is a blog automation platform built for content creators who want to grow traffic without doubling their workload.
The bigger time-saver is the autoblogging feature. Connect RightBlogger to your YouTube channel and it automatically converts new uploads to blog posts, no manual work after the initial setup. I put together a full guide on how to automate your blog that walks through the whole setup if you want to see how it works end to end.
FAQs about Converting YouTube Videos to Blog Posts
What if the YouTube video doesn’t have a transcript?
If the video doesn’t have a transcript, use a third-party service like Rev or MacWhisper to create one. Most videos have an auto-generated YouTube transcript, but newly uploaded and very old videos sometimes don’t. Some tools, including RightBlogger’s transcription tool, can generate a transcript directly from a YouTube link without needing to download anything first.
How do I make longer blogs?
Getting AI to write longer posts consistently takes a bit of structure:
- Generate the outline first, then prompt the AI to write each section separately and tell it which section you’re working on.
- Add a word requirement in the prompt, like “Write at least 700 words.” This works better on more capable models and tends to fall short on lighter ones like GPT-5.4 mini.
- Set a minimum word count per section in your outline prompt so the AI knows what you’re expecting from the start.
Writing each section separately is the most reliable way to hit a longer overall word count.
How do I export blogs to my website?
Copy and paste the output from ChatGPT directly into your CMS (WordPress, Webflow, Squarespace, etc.). If the formatting isn’t coming through cleanly, add “Respond with Markdown” to your prompt. This ensures headings, bullet points, and bold text carry over as expected.
What if the transcript is too long?
If the transcript hits the AI’s context limit, here are your options:
- Use GPT-5.4, Claude, or Gemini. All three have large context windows and most transcripts won’t come close to exceeding them.
- Only paste the section of the transcript you actually want to blog about.
- Summarize the transcript first with RightBlogger’s summarizer, then use the summary to generate your outline.
What are some video to blog tools?
Here are paid and free options to help convert videos to articles:
- Video To Blog: Free video to blog tool to generate articles from YouTube videos.
- RightBlogger: Paid tool suite for bloggers and YouTubers that includes a video to blog converter and full autoblogging.
- RyRob Video to Blog Tool: Free converter to quickly turn videos into blog posts.
- Video To Blog AI: Paid service with advanced options including automatic video screenshots.
Conclusion
Repurposing YouTube videos as blog posts is one of the smartest moves a content creator can make. You’ve already done the hard work of researching, scripting, and recording. Turning that into a post takes a fraction of the time and puts your content in front of an entirely different audience.
Do it manually with the steps above, or connect RightBlogger to your channel and let it run on autopilot. Either way, your videos are too valuable to live in just one place.